
7 Surprising Facts About St. Patrick's Day

7 Surprising Facts About St. Patrick’s Day

History Channel | Feb 22, 2023 | St. Patrick’s Day | Shield WebSite | Start a quote

Who was the real St. Patrick? Was that legend about the snakes true? And why did so many St. Patrick’s Day traditions start in America?

While St. Patrick’s Day is now associated with wearing green, parades (when they’re not canceled) and beer, the holiday is grounded in history that dates back more than 1,500 years. The earliest known celebrations were held in the 17th century on March 17, marking the anniversary of the death of St. Patrick in the 5th century. Learn more about the holiday’s history and how it evolved into the event it is today.

The Real St. Patrick Was Born in Britain

Much of what is known about St. Patrick’s life has been interwoven with folklore and legend. Historians generally believe that St. Patrick, the patron saint of Ireland, was born in Britain (not Ireland) near the end of the 4th century. At age 16 he was kidnapped by Irish raiders and sold as a slave to a Celtic priest in Northern Ireland. After toiling for six years as a shepherd, he escaped back to Britain. He eventually returned to Ireland as a Christian missionary.

There Were No Snakes Around for St. Patrick to Banish from Ireland

Among the legends associated with St. Patrick is that he stood atop an Irish hillside and banished snakes from Ireland—prompting all serpents to slither away into the sea. In fact, research suggests snakes never occupied the Emerald Isle in the first place. There are no signs of snakes in the country’s fossil record. And water has surrounded Ireland since the last glacial period. Before that, the region was covered in ice and would have been too cold for the reptiles.

St. Patrick’s Day is Likely Based on Celtic Fairies

The red-haired, green-clothed Leprechaun is commonly associated with St. Patrick’s Day. The original Irish name for these figures of folklore is “lobaircin,” meaning “small-bodied fellow.” Belief in leprechauns likely stems from Celtic belief in fairies— tiny men and women who could use their magical powers to serve good or evil. In Celtic folktales, leprechauns were cranky souls, responsible for mending the shoes of the other fairies.

St. Patrick’s Day Shamrock Was Considered a Sacred Plant

The shamrock, a three-leaf clover, has been associated with Ireland for centuries. It was called the “seamroy” by the Celts and was considered a sacred plant that symbolized the arrival of spring. According to legend, St. Patrick used the plant as a visual guide when explaining the Holy Trinity. By the 17th century, the shamrock had become a symbol of emerging Irish nationalism.

The First St. Patrick’s Day Parade Was Held in America

While people in Ireland had celebrated St. Patrick since the 1600s, the tradition of a St. Patrick’s Day parade began in America and actually predates the founding of the United States. 

Records show that a St. Patrick’s Day parade was held on March 17, 1601 in a Spanish colony in what is now St. Augustine, Florida. The parade, and a St. Patrick’s Day celebration a year earlier were organized by the Spanish Colony’s Irish vicar Ricardo Artur. More than a century later, homesick Irish soldiers serving in the English military marched in Boston in 1737 and in New York City on March 17. Enthusiasm for the St. Patrick’s Day parades in New York City, Boston and other early American cities only grew from there. In 2020 and 2021, parades throughout the country, including in New York City and Boston, were canceled or postponed for the first time in decades due to the outbreak of the COVID-19 virus. They returned in 2022. 

The Irish Were Once Scorned in America

While Irish Americans are now proud to showcase their heritage, the Irish were not always celebrated by fellow Americans. Beginning in 1845, a devastating potato blight caused widespread hunger throughout Ireland. While approximately 1 million perished, another 2 million abandoned their land in the largest-single population movement of the 19th century. Most of the exiles—nearly a quarter of the Irish nation—came to the shores of the United States. Once they arrived, the Irish refugees were looked down upon as disease-ridden, unskilled, and a drain on welfare budgets.

Corned Beef and Cabbage Was an American Innovation

The meal that became a St. Patrick’s Day staple across the country—corned beef and cabbage—was an American innovation. While ham and cabbage were eaten in Ireland, corned beef offered a cheaper substitute for impoverished immigrants. Irish-Americans living in the slums of lower Manhattan in the late 19th century and early 20th, purchased leftover corned beef from ships returning from the tea trade in China. The Irish would boil the beef three times—the last time with cabbage—to remove some of the brine.

Click here for more fun facts about St Patricks Day!


More great articles by Shield Insurance Agency

Read More
Pet Safety Tips

Pet Safety Tips for the Summer

Foremost Insurance | by Jenean McLoskey | Pet Safety Tips | Pet Insurance | Shield Insurance

Pet Safety Tips

Summertime means spending long days in hot, sunny weather with your furry loved ones by your side. It’s the perfect time for you and your pet to be more active. However, having a fur coat can pose some risks for your pets if they are in the sun for too long. Since they don’t sweat like humans, they can overheat a lot faster than we can. But don’t worry! There are plenty of precautions you can take to ensure they’ll be safe and content in the summer heat. Here are five pet safety tips to keep in mind while playing outside this summer:

Have plenty of water on hand.

Your pet will be thirstier than normal during the summer and can get dehydrated very quickly. Always provide plenty of fresh, cold water as needed. If you’re going on a long walk, have a few water bottles on hand for water breaks, and keep them in the shade as much as possible.

Never leave your pet in a car unattended.

This is extremely important! Leaving animals in a parked vehicle is incredibly dangerous. Even if the windows are down, they’re still at risk of fatal heat stroke.

Keep their paws protected.

Walking on hot cement or asphalt for long periods of time can cause your pet to overheat a lot quicker, and can burn their sensitive paws. Always feel the pavement before taking a walk to see how hot it is, and walk them in the early morning or evening when it’s not the hottest time of the day.

Never use fireworks around your pets.

Celebrating with fireworks during the summer is fun and exciting for most humans, but it can be traumatizing for your dog or cat. Loud noises can scare and disorient them, and lit fireworks could cause accidental severe burns. Always keep them away from the noise in a safe, sheltered area.

Know the symptoms of overheating.

Dogs and cats are at high risk of overheating during the summer. If you notice any heavy panting, thick drool, or vomiting, move them to a cool place and give them water immediately. You may get a damp towel and wrap it around them, but experts advise to never put them in cold water because it can cause shock. If symptoms don’t improve, take them to your local vet right away.

If you practice these safety tips, you should feel confident to enjoy the summer with your furry friends. Have fun and be safe!

Need Pet Insurance to go along with the Pet Safety Tips?


More great articles are at the Shield Insurance Agency Blog!

Read More
ATV Trail Riding Survival Kit

ATV Trail Riding Survival Kit

Foremost Insurance | by Marrio Roberts Jr. | Survival Kit | Recreational Vehicle Insurance | Start A Quote

ATVs and other off-road vehicles are adaptable to many situations. With that being said, you can’t always predict what will happen on off-road adventures. If you need to perform emergency maintenance, it will help to be equipped with the proper tools. To prepare yourself in advance, Foremost® Insurance recommends keeping the following items in your ATV emergency kit.

Air pump and tire repair kit.

When traveling off-road you’re more likely to encounter various bumps in the road, like rocks or even holes, that can flatten your tire. If you have a tire repair kit handy, you should be able to patch small holes. Many repair kits come with air pumps, but it may be a great idea to bring an extra one just in case.

Tool kit within the Survival Kit

It helps to have a tool kit handy if you can. If you need to remove a tire or access a part of the vehicle that’s enclosed under something else, you may need more than just your hands to get the job done.


Duct Tape.

While we don’t recommend using duct tape for any serious repairs, it may be able to temporarily patch a leak in a water hose or radiator bottle, for example, which can buy you enough time to get to a repair shop. Additionally, duct tape can be useful if you or someone else falls off a vehicle. We highly recommend seeking professional medical attention in this situation, but if someone twists their ankle, using duct tape can help to stabilize it until you get to a medical facility.

A knife.

A knife can be useful if you or someone you’re with has an injury, as it can be used to cut bandages and wrap tourniquets. Whether you opt for a Swiss army knife or a regular pocket knife is up to you. A Swiss army knife may apply to more situations overall, but in terms of practicality, a pocket knife may be enough.

Jumper cables as part of the Survival Kit

Of course, jumper cables will be useful if you or someone else’s vehicle loses battery power. We recommend always keeping these with you.

First aid kit within the Survival Kit

First aid kits can be useful for treating minor scratches and bruises. With the unpredictable terrain of off-road adventures, you never know when you’d need these.

Bug spray.

It’s not uncommon to encounter bugs when you’re off-roading. If you don’t want those pesky creatures bothering you, keep some bug spray in the vehicle. This way if you forget to put some on before you head out, or if it wears out, you’ll always have some to reapply.

Spare tire.

While we do advise keeping a tire repair kit, they don’t work in every situation. There may be times when a tire is damaged beyond repair. In this case, you’ll need a spare tire.

Spare parts for the survival kit

You should keep a spare of the following parts: belt, spark plug, tie-rods, and ball joints. While these require a bit of handy work to replace, if you don’t have any spares on hand, you may become stranded.

Tow strap.

If you do become stranded, you will need someone to tow your vehicle to a safe place. We advise you to keep a tow strap on hand in case this happens.

To lessen your chances of having emergency situations, please ride safely.

If you’re looking for ATV insurance, UTV insurance, or insurance for another off-road vehicle (ORV), you can get a quote with Shield Insurance Agency today!


More great articles featured by Shield Insurance Agency

Read More
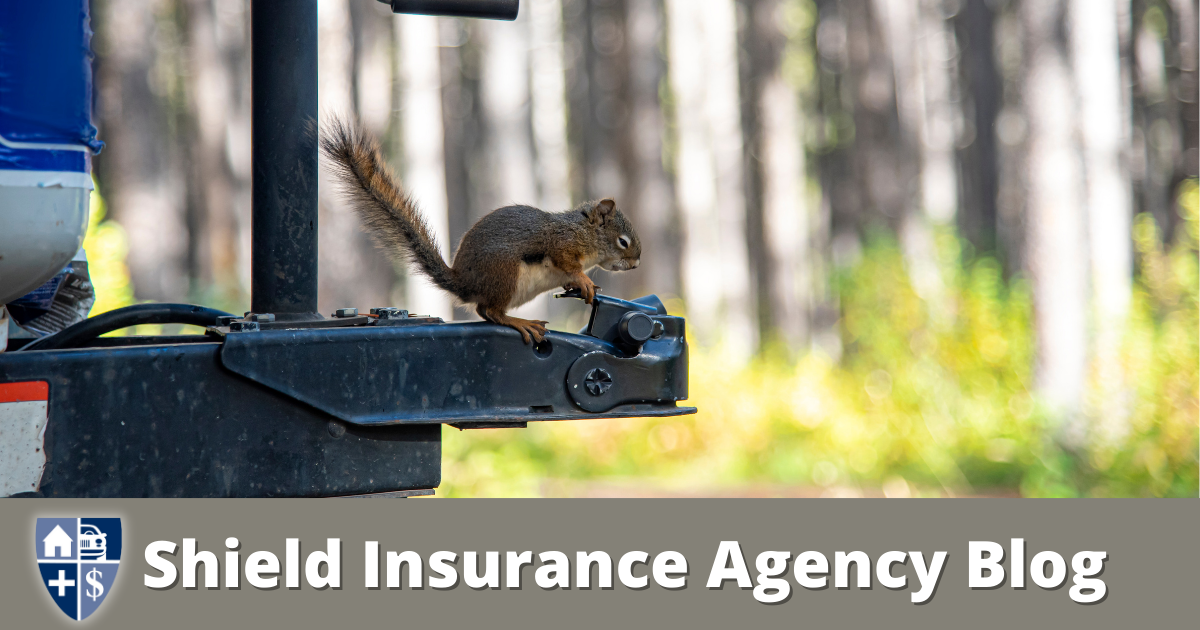
How to Hitch a Trailer

How to Hitch a Trailer

Foremost Insurance | by Marrio Roberts Jr. | Hitch a Trailer | Auto Insurance | Request a Comparison Quote

Hooking up a trailer to a vehicle requires patience and attention to detail. If you don’t know what you’re doing, the process can be frustrating, and way harder than it should be. Luckily, Foremost® prepared this guide to help you feel more confident and move forward with a plan.

First of all, remember that ball hitches are not one-size-fits-all. Before you start towing anything, research to make sure you have the right ball hitch for the situation.

Once you know you have the right ball hitch, you can get started. According to driving-tests.org, the first thing you should do is use the trailer jack to position the coupler a few inches higher than the ball hitch. Then, you should align the ball hitch with the coupler on your trailer, and back the vehicle up so that the coupler is directly above the hitch.

Once aligned, you should be able to lower the coupler onto the hitch. Then, you can latch the coupler and lock it in place. After that’s complete, you can remove the jack.

Next, you should attach the safety chains from the trailer to the vehicle in a crisscross pattern. So, attach the left chain to the right side, and attach the right chain to the left side. This pattern is recommended so that the chains can catch the trailer if it detaches.

When all that is done, you can plug in the electrical wires from the trailer to the vehicle. Be sure to check all lights to ensure they’re working properly. If they are, you’ll be all hitched up and ready to go!

Shield Insurance Agency has insurance policies for cars, trucks, trailers, boats, and many other things you could be towing. If you’re looking for insurance, you can get a quote with us today!


More great articles featured by Shield Insurance Agency

Read More
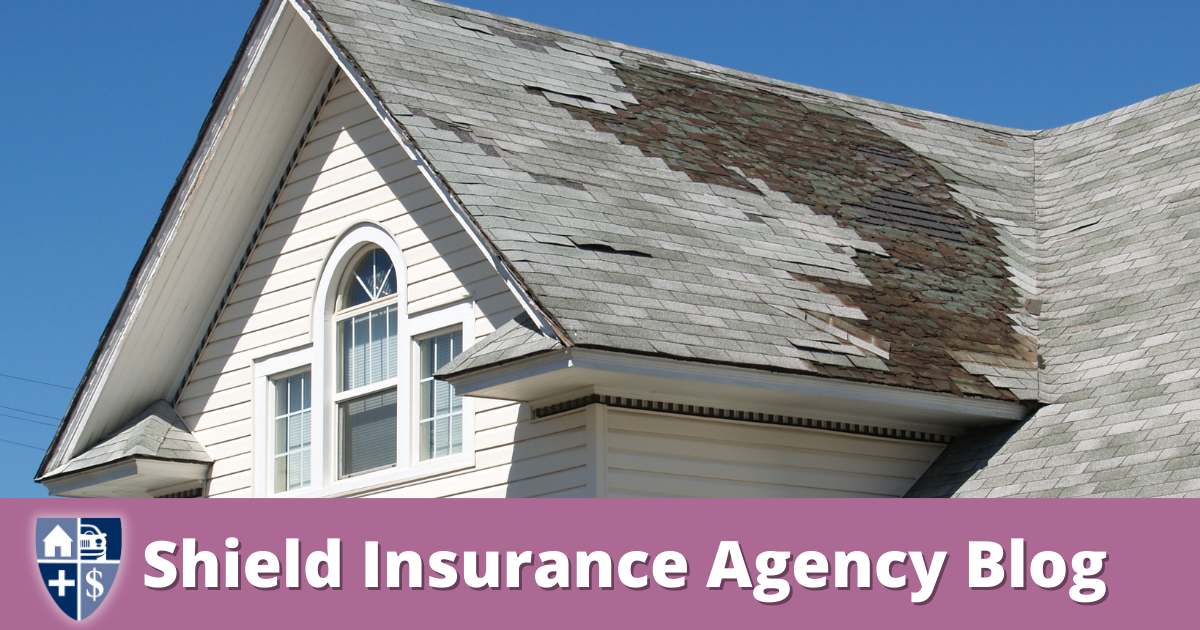
Is it Time for a Roof Replacement?

Is it Time for a Roof Replacement? Look for These 8 Warning Signs

Foremost Insurance Blog | by Jenean McLoskey | Roof Replacement | Home Insurance | Quoting Portal

You may tend to overlook your roof, but it’s actually one of the most important component of your home – and the most vulnerable. It protects you from the elements like rain, snow and sun, but roofs don’t last forever and it may be time for a roof replacement.

You may not think about the importance of roofs until you, a neighbor, or a friend has a situation that causes a reality check. So, when it comes to roof maintenance, there are two key questions you should be asking:

How long does a roof last? According to the Good Housekeeping magazine, shingle roofs should last between 15-30 years (if you have a different type of roof, such as metal or clay tile, you may have to follow different rules). If your home is new or the roof was recently replaced, you should be in the clear. However, it doesn’t hurt to do a checkup after getting hit with severe weather like a hailstorm, ice and snow or crazy rain.

Here are eight warning signs to look for when condiering a roof replacement:

  • Loose shingle tabs
  • Cracks in shingles
  • Broken or missing tabs
  • Buckling or curling shingles
  • Shingles covered in moss or algae
  • Majority of granules worn off tabs
  • Sunlight is shining through the attic
  • Extensive leaking

According to Home Advisor, a roof replacement can range anywhere from $6,000 to $12,000. The size of your home, the materials used and where you live will affect that price range. It’s no small sum, but in return for the investment, you’ll add thousands of dollars to the resale value of your home and ensure a safe and habitable dwelling for years to come. Don’t need a new roof right now? Do a quick check each month to see if maintenance is needed. If you notice problems like missing shingles or signs of water damage, be sure to call a roofing specialist to make the repairs as soon as possible – it could save you a bundle by prolonging the life of your roof and stopping costly leaks in their tracks.


Read more blog articles featured by Shield Insurance Agency

Read More
Emergency Water Storage

Emergency Water Storage

Foremost Creative Team | Emergency Water | Flood Insurance | Comparison Quoting Portal

The loss of safe drinking water is deadly. Most individuals will begin to experience side effects from dehydration after 36 hours. Starvation can be delayed by several days or weeks provided there is an ample, safe emergency water supply.

At the bare minimum, you should store one gallon, per person, per day, for seven days. A three-week supply is ideal.

After an earthquake, city water is vulnerable to contaminants through ruptured pipes and adulterated filtering systems. Do not take adequate water supplies for granted. If you store an ample amount for your family beforehand, you’ve already greatly increased your family’s chance of survival after an earthquake.

Proper Water Storage

Most grocery stores sell water in one or two-gallon containers. These are not designed for long-term storage and will leak after six months. Your best option is to purchase one to five-gallon sealable containers of water from your local camping store. All stored water must be in a sanitized container and the water must be treated to avoid contamination by bacteria and algae. If you are storing your own water, treat the water as soon as you store it in the container with eight drops of pure, unscented liquid bleach per gallon of water. You must also rotate your water supply every six months, which includes store-bought treated water as well as the water you’ve treated yourself.

If your water supply is questionable, use these methods to treat it:

The best option: Add liquid chlorine bleach – eight drops per gallon of water. Double this amount if the water is cloudy.

A good option: Add 2% tincture of iodine to the water, or twelve drops per gallon of water. Double this amount if the water is cloudy.

An acceptable option: Boil the water vigorously for 10 minutes.

Dirty water should be strained through cheesecloth, a paper towel or a coffee filter before treating it to remove suspended matter. Wash and sanitize all food containers before use by washing them with warm, soapy water followed by a 10% bleach solution. Empty the bleach out after a five-minute soak, and let dry.

Emergency Water Sanitation

As part of your earthquake supply list, it’s also key to provide sanitation items. Having these materials staves off infection or illness that is caused by unsanitary conditions, and also makes a stay at a shelter or other unfamiliar or rustic territory more comfortable and worry-free. Store these items in your equipment kit as well:

  • Plastic bags – heavy-duty garbage can size and small, zip-lock types
  • Powdered chlorine lime – proper storage is required. This is an oxidizer and it’s corrosive.
  • Portable camp toilet with chemicals
  • Toilet paper
  • Handi-Wipes for water-free cleaning
  • Shampoo, toothpaste, deodorant, tampons, and sanitary napkins
  • Insect, fly, mosquito, and ant spray

For more information on Emergency Water Storage visit these sites:


More interesting reads by Shield Insurance Agency

Read More
Get Your Boat Ready for Spring

Get Your Boat Ready for Spring

Foremost | by Marrio Roberts Jr. | Boat | Boat Insurance | quoting portal

Springtime is here! The weather is beautiful, the water is inviting, and your boat is looking better now than when you first laid eyes on it. The only thing that would make your marine beauty even better is a gorgeous body of water underneath it. But not so fast…

Before you take your boat out on the water, complete the actions on this de-winterizing checklist created for you by Foremost® Insurance.*

  1. Check engine and fluid levels.
    To keep your boat running smoothly, remember to check engine and fluid levels. This includes engine oil, oil filters, power steering, coolant, and transmission fluid. If you didn’t change your engine oil, oil filter, and drive lubricants before winter, you can do this now. For everything else, check for any leaks and repair the source first. Once this is addressed, refill the fluids.
  2. Inspect your battery.
    If your vessel has been idle for a long period of time, it’s likely the battery is dead and will need to be recharged. Additionally, the water in the battery can freeze in the winter. When this happens, the water can expand and cause cracks in the battery creating irreversible damage. If there are no issues here, ensure that your battery is filled with the proper amount of water. Be certain to use distilled water and not tap water, which can diminish performance. Next, check for any corrosion and clean the battery with a mix of baking soda/distilled water. If you discover your battery is damaged beyond repair, replace it.
  3. Examine the boat’s exterior.
    When checking the exterior of your seagoing machine, look closely for any cracks and holes. Check all around the hull and underneath it. If you notice any damage, repair them immediately. Always remember: “boats don’t sink because of water around them, boats sink because of water that gets into them.”
  4. Check the belts.
    Lack of use during winter can cause belts to crack and break. This happens because of the stress and tension placed on the belts. If any belts are cracked, replace them. You will also need to replace your belt if it’s loose or if you notice black soot around the pulley.
  5. Examine fuel lines.
    The cold winter weather can cause damage to your watercraft’s fuel line. Damage to your fuel line can stop fuel from reaching the engine, and your boat won’t run. Be sure to check this when you pull your watercraft out in the spring. Pay close attention to your fuel hoses and replace them if you see any leaks. Replace any section of your fuel system that show any leaks, cracks, or structural damage.
  6. Inspect the sails (if applicable).
    Winter weather can cause considerable damage to your sails. Take note of the shape of your sails. If your sails don’t maintain proper form, you could have issues when boating in strong wind. Lookout for wear, chafing, and other structural damage. Inspect your bolt rope and replace it if it is fraying or weak. If your sails are damaged, replace them.

It is important that you perform each action in this checklist with as much attention to detail as possible. Properly de-winterizing your watercraft is crucial to your performance and safety out on the water.

*Please note: You should also follow the manufacturer’s recommendations for any other maintenance requirements not mentioned in this article.


More Shield Insurance Blogs for you

Read More
Top 3 challenges entrepreneurs face

Top 3 challenges entrepreneurs face

The Foremost Team | entrepreneurs | Business Insurance

The bell above the door dings and the first customer of the day enters. Grandpa hops up from his desk and greets the customer with a small-town smile ready to answer any question the customer has about his window and door display. Grandma is ready too. She’s in the back room rolling new screens on old frames, ready for any customer problem—broken glass, a hole in the screen, or bent slider frames. I was busy rolling sticky letters on the windows, drawing pictures for my grandpa’s back office, and giving the customers a big five-year-old toothless grin as they entered the shop.

When I think of a small business, memories of my grandparent’s little window and door shop come to mind. With humble beginnings, they poured all they had into their business, but it didn’t come without its challenges. In fact, putting aside economic impacts on a small business, there are several challenges that entrepreneurs face daily to keep the doors open.

Putting aside economic impacts on a small business, there are several challenges that entrepreneurs face daily to keep the doors open.

Here are the top three obstacles small business entrepreneurs face on a daily basis:

  1. Client Base and ServiceGrowing your client base can be a challenge, but it’s vital. Your business might have created the most useful thing since a toothpick, but if no one knows about it, income is doomed. Attaining clients can be hard for those that don’t have a marketing plan or don’t know how to implement it. One step beyond that is retaining a customer base and providing a great product or service that keeps the client motivated to come back.
  2. FinancesMoney management is essential to keep a small business operating, even when the cash is flowing in. Many small business owners have their own assets invested in the company, which means added pressure when business is slower than anticipated. Poor planning and lack of funding can be added stressors.
  3. TimeMany business owners, even successful ones, usually work more hours than their employees and more hours than they plan on. The constant pressure to grow can lead to more work and result in exhaustion. Even those with high energy and passion can find themselves fatigued. It’s important for business owners to find the right pace to keep the business running and the employees positive and healthy.

Most smart small business owners consider the challenges they might face before they even begin. Although daily obstacles are sure to come up for a business, it certainly doesn’t mean failure is ahead. In fact, facing these types of obstacles is sometimes what drives people to pursue their dream in the first place, like my Grandpa. The old window and door shop didn’t come without stress, but that’s what drove him and grandma to continue excellent customer service and impeccable work. He ran a successful small business for years, devoted time to his family, and retired early. I’d say that’s the dream most people hope for.

Protect what you own and what you do.


More interesting blog articles by Shield Insurance Agency

Read More
Five Ways to Cook While on the Road

Five Ways to Cook While on the Road

 by Jenean McLoskey | Cook | RV Insurance | Shield Self Quoting Portal

Traveling on the road in your Recreational Vehicle can get pricey if you eat out for every meal, but cooking your own meals may require some creativity. While many RVs do have full, functional kitchens, some may not have that option. However, there are other ways to cook your meals in and around your RV safely, even if you don’t have a source of heat.

Here are five unique ways you can cook delicious meals while you’re on the road!

  1. Propane StoveIf you already have a stove in your RV, use it to your advantage! The burners are most likely smaller than your regular stove at home, so be sure to buy the appropriate-sized cookware for it. Keep in mind that if you have a refrigerator in your RV, it most likely runs on propane too. Be sure to bring enough propane tanks on your trip if you plan on using both!
  2. Portable Grill No stove? No problem! There are plenty of electric grills you can bring on the road to cook all of your favorite foods. Please remember, do not use any of these grills inside of your RV due to flames and the poisonous gases these grills can give off. They are for outside use only!
  3. Cook With FireWho doesn’t love a good cookout? Many RV parks offer fire pits and grills for guests, so you may not even need to bring your own. This is also a perfect opportunity to grill a bunch of foods at once so you have leftovers for the next couple of days. With this option, you also need to make sure you are not around your RV while grilling to avoid a serious fire or any kind of explosion.
  4. Home Kitchen AppliancesYou don’t need to say goodbye to your favorite appliances just because you’re away from home. You can bring along your toaster oven, microwave, pressure cooker, blender, etc. as long as they are all safe for RV usage. If you are unsure if your appliance is safe to use, call the manufacturer to get more information.
  5. Prepare No-Cook MealsIf you have no stove, no grill, or you’re just not in the mood to cook – go cold! There are plenty of recipes you can prepare without heat such as salads, sandwiches, wraps, pastas, and, of course, any kind of fruit.

Before you begin cooking food of any kind in your RV, you should have basic fire safety materials available at all times. Putting together an easy-to-access fire safety kit and having a fire extinguisher on hand will make all the difference during your cooking ventures. Visit the Learning Center for more information on RV fire safety. Have fun and happy cooking!


More great posts by Shield Insurance Agency

Read More
Things to consider before renting an apartment

Things to consider before renting an apartment

 Foremost | by Jenean McLoskey | Renting an apartment | Renters Insurance | Shield Self-Quoting Portal

It’s no secret that renting an apartment can be stressful. It can be hard to find the perfect one that meets your checklist, and that’s within your budget.

When I searched for my first apartment, I considered myself lucky when I found a dream dwelling right away! The walls were painted a deep olive green, granite countertops in the kitchen and I had my own bathroom, which is a big deal if you have a roommate. To make it even better, it was in a great location, and close to my job at the time. Before the landlord could even ask, I signed a year’s lease with my best friend. All seemed well until small fees started popping up on the contract and the rules of the property got longer and longer. That’s when I thought to myself, maybe I should have looked more into this renting thing before signing off my hard-earned money for a whole year.

All ended well with that apartment, but I moved out as soon as I could and learned a lot from the experience. Luckily, I’m here to share those tips and research with you!

When renting an apartment, here are a couple of things to focus on:

  1. Find out how to pay rent, and how late fees are calculated. Most properties nowadays have an electronic payment option and will charge a small fee for doing so. In that case, it may make sense to write a handwritten check your landlord.
  2. Will the maintenance workers enter your apartment without notice? Because you don’t own the apartment, some landlords have very loose rules on whether their employees have to tell you when they’re stopping by. Make sure your landlord will give you a heads-up before someone enters your apartment.
  3. What is their guest policy? Having a friend from an out-of-town stay over for a few nights is fine, but some landlords have policies against anyone staying longer than two weeks.
  4. Find out if you can sublet the apartment, or what the penalty is for breaking your lease. Life’s full of surprises, and you may run into a situation where you need to move ASAP. Some apartments are strictly against subletting, and it could be a serious breach of your contract. If you leave on bad terms, this could mean you just lost a future rental reference.
  5. Can you make changes to the apartment? Adding some fresh paint and putting your own personal touch on the apartment could end up costing you at some complexes.
  6. What utilities are included in the rent? This could make or break your decision on your ‘dream’ apartment. Renters are usually left to pay electric, gas, internet, and cable — but it’s different at every complex.
  7. Does the landlord require you to obtain renters insurance? Your landlord should tell you before you sign the lease whether they require you to have this. Renters insurance is important to have even if the landlord doesn’t require it.
  8. What is the parking situation? This is another big one. Find out if it’s included in your rent or not. If parking isn’t provided, what are the alternatives?

Finally, don’t be overwhelmed. Enjoy the apartment-hunting adventure and do your research before signing.


More blogs by Shield Insurance Agency

Read More